Whether you believe in catching your dreams, or just want a fancy decoration for your room. This dream catcher is perfect for you!
Materials Needed:
- A Wooden or Metal Hoop
- Doilies
- String, Cotton or Twine
- Decorations: Feathers, Beads, Buttons, Lace, Leaves, Bells, Pearls.
- A Darning Needle
- Scissors
Instructions:
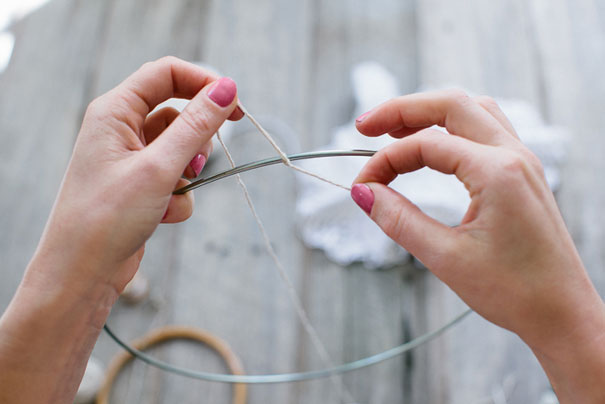
1. Thread your darning needle with twine (string or cotton) and tie one end to the hoop.
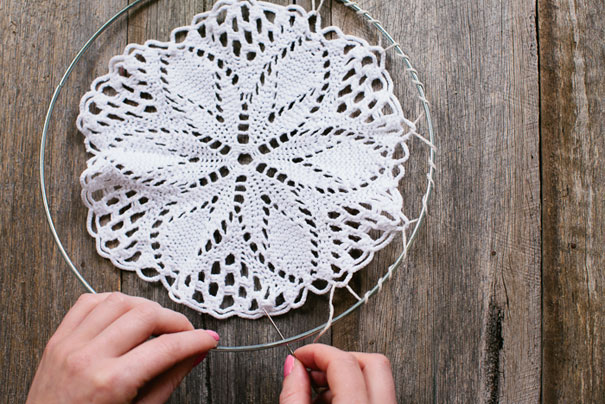
2. Thread the twine through the edge of the doily and then loop back round to the hoop. Loop the needle round the hoop another 4-5 times without going through the doily. Then catch another section of the doily further along.
3. Repeat step 2 around the entire edge of the hoop.Once back at the beginning, tie a knot to the hoop to secure the doily in place. Cut any excess twine hanging off.
4. Tie an additional length of twine to the top of the hoop.This length of twine will be become your hangar. Make sure you have enough length so it will hang at the length you require, so if it is to hang from a door way keep it quite short, but if it’s to hang from a tree you might want to keep the length quite long.
5. Cut additional lengths of twine. These will be used for your hanging decorations. Tie the end of one piece to the base of a feather. Thread needle onto the other end.
6. Thread the needle through the beads and other decorations till they sit on top of the feather. Keep adding buttons and other bits and pieces until you are happy with the amount of decorations on each string.
7. Lay out all your strings and place them in the order that you wish to hang them from the hoop, play around with the positioning a bit until you get the balance quite right.
8. Tie the string decoration to the base of the hoop. Start in the middle and work your way around the edge. Add additional lace, strings of pearls and other embellishments to fill the space between your handmade strings and bobs your uncle! Your dream catcher is ready to hang.
credits to: bloglovin.com













Comments
Post a Comment