

Even if you prefer the sewing machine, there are still times when you HAVE to hand stitch something in place or closed. So my advice, is to get comfortable with that first.
And for little kids, it helps to let their hands manipulate the needle and thread and gain an understanding of the thread going up and down and securing itself to the fabric (or in this case, a plate). It helps to demonstrate in a very basic way, how the sewing machine works. So, letting those fingers explore is a great way to begin the sewing adventure.


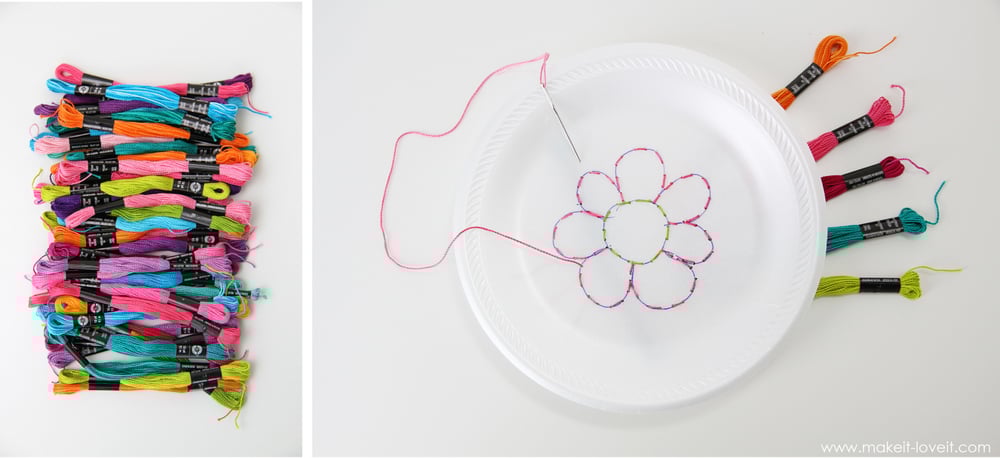
So all you need is some fun and colorful embroidery thread. And some Styrofoam plates (which are easy to poke through and stay nice and stiff while your beginner learns to make stitches).
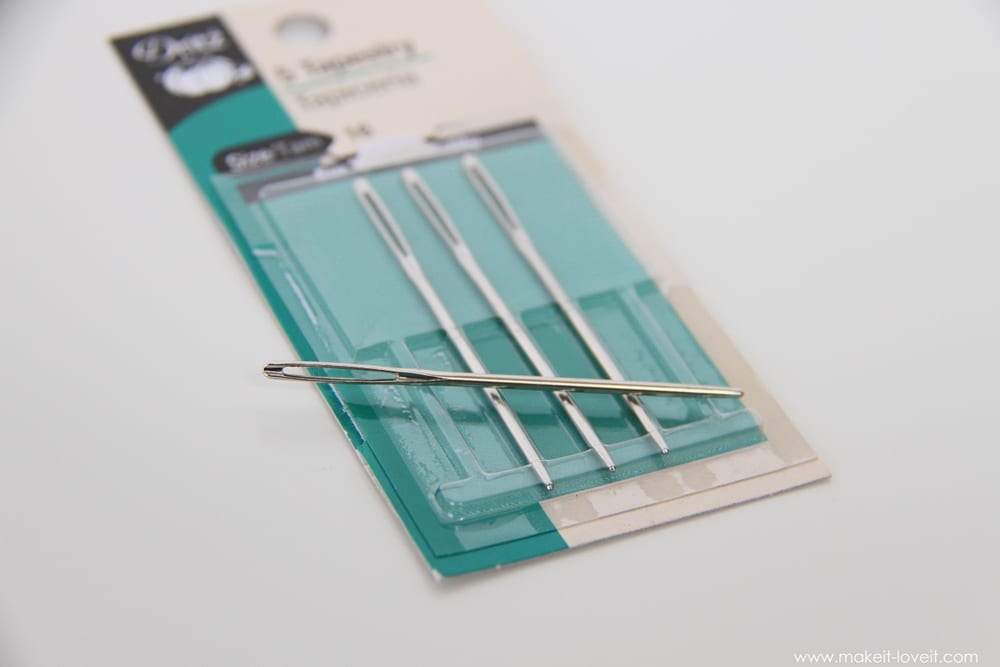
As for needles, I like Tapestry needles best. They generally have a really big eye for the thread to slip through (making it easier for kids to thread themselves) and a dull point.

Truly, a fun thing to see, my sweet little ones, experiencing a small taste of something that I truly love. I sure hope by teaching them young, that they’ll always appreciate the art of sewing. And hey, maybe one of them will take things much further than I ever will and we’ll see their designs in stores one day!
Instructions:
Note: First of all, I’m not sure there’s a magic age to begin teaching someone to sew. Whatever age your kid is they will enjoy this project and there will be very little frustration. In fact, your kids might ask several more times to use the needles and thread and a few plates to create some of their own creations. But, I’m thinking a good guide would be, if your child can use a pencil and draw letters and shapes, then they probably have enough hand control to at least try hand sewing. And if it fails miserably, tuck it all away and try again in a few months. No need to push this.
1. Anyway, to begin, allow your little one (or your student) a little exploratory freedom. Let them get used to the needle and thread and just go up and down with these new items.
2. To let them do so, thread your needle and then tape the end of the thread to the back of your Styrofoam plate. If you tie a knot, it will most likely just pull through the Styrofoam. The tape holds it in place very nicely.

3. Then explain the idea of the needle going up and down through the plate. And be sure to demonstrate a few times, so that they understand that whatever side of the plate that the thread came out of last, is the side that you poke the needle back into. Then let them do their own thing and become more comfortable with it.

4. And if the thread comes out, show them how to re-thread the needle themselves.

5. And when you can see that they understand how that works, it’s time to move on.
Here’s a sample practice plate:

6. I was a little surprised at how well my child did with this. He clearly understood how it all worked and was able to carefully pull the thread through the plate from both sides.

7. His little mind was so curious how it all worked. And he was so proud of himself with every stitch.

8. And here’s another sample practice plate:

9. Now, it’s time to follow some lines and gain some control. So, I quickly drew some shapes on the plates and let them practice.

10. Tape the thread to the back of the plate, just like you did above but be sure it’s out of the way of the drawing or they’ll have a hard time poking their needle through it. And then guide them to a good starting point.

11. And then let them practice going up and down, right along the existing line.


12. At the end, add a piece of tape to the other end of the thread so that it doesn’t come loose.

13. If they want to change colors, let them!! Just use tape at each end. Learning knots is for another day.

14. And then one more idea and something really rewarding for little ones, is to let them draw their own image.

15. And then let them stitch along their own creation and feel extra proud of their hand-sewing skills!
And that’s it for today.
If your child (or you, if you’re the student) feels comfortable with this, it’s time for the next step.
credits to: makeit-loveit.com

Comments
Post a Comment