Using a sewing machine for the first time can be a little daunting but just relax, take your time and have some fun with it. Practise stitching on some calico (unbleached cotton) or plain medium-weight cotton - basically you want something that’s cheap and not slippery. Pick out some brightly coloured thread that stands out against the fabric so you can monitor your stitches … and marvel at how your accuracy improves with practice!


Preparing to stitch
Check your sewing machine is threaded up correctly, then turn it on. Make sure it's set to the straight stitch setting with a stitch length of around 2.4mm or 2.5mm - these should be the default settings. On a mechanical machine, you usually need to turn the knobs to change the setting and stitch length; on a digital model you select the stitch type and length with buttons.

Pull out about four inches or so of spare thread under the presser foot and towards the back. This extra thread will help prevent the machine from unthreading itself when you start sewing. It also helps to start with the needle in the uppermost position, and to hold onto the threads when you make your first stitches.
Place your fabric under the presser foot with the area you want to stitch in front of the machine, and lower the presser foot to hold it in place. NB. Lowering your presser foot is essential to help keep the fabric in place (unless you’re doing some freestyle machine embroidery) but is easy to forget – you might want to make your sewing mantra “lower your presser foot” for a while…
The upper/spool thread should be under the presser foot but on top of the fabric, and the lower/bobbin thread underneath the fabric. Both threads should be sticking out towards the back so you don’t sew over them and tie them in knots.
Before you start any new line of stitching, check that the needle is lifted as high as it can go (turn the handwheel to adjust it). This helps to avoid the frustrations of stuck or unravelling thread.

Go!
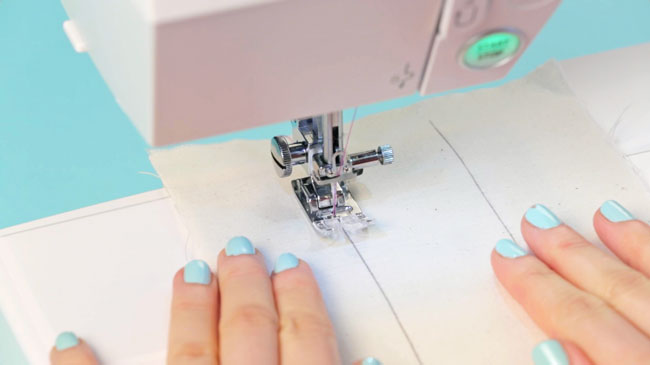
Turn your machine on. Place both hands lightly on the fabric either side of the presser foot to help guide it as you’re stitching - but don’t push or pull. Needless to say (arf!), keep your fingers out of the way of the needle. Gently lower your foot onto the pedal to start stitching…
Wooooooooooooooooooo!
Fun, isn’t it? Right, I’ll let you enjoy that for a little while…
Okay, back to business. Some machines have speed setting buttons, so you can start slow and build up speed as you throw caution to the wind. If your machine doesn’t have this luxury, you’ll have to learn to control the speed by how much pressure you apply to the pedal. Apparently this is like driving a car, but I wouldn’t know because I don’t drive :)

Using the handwheel or needle up/down button
If you want to stitch reeeeeally sloooowwwly – or maybe just move forward by one or two stitches for added precision – you can use the handwheel at the side of your machine. Turn it towards you to basically perform the same function as the pedal but manually. I sometimes use the handwheel to make the first stitch into the fabric to avoid the thread coming loose and to ensure the needle goes exactly where I want it to go.
Some machines also have a needle up/down button - usually marked with two arrowheads - which will perform the same function, just quicker. Press it once to move the needle down; press it again to move the needle up - and that's one full stitch.


Securing your stitches
To prevent your stitching from unravelling, you can "back tack" (AKA backstitch or reverse stitch) over the start and end of each line of stitching to secure it in place. Hold down the reverse stitch lever or button on your sewing machine - often marked by an arrow turning around - and put your foot down on the pedal while still holding the button down to sew one or two stitches over the start or end of your stitching. Let go of the button and continue sewing.

Cutting loose
Once you’ve finished stitching, raise your presser foot so you can pull your fabric out a little. The needle will need to be raised – you can use the hand wheel or needle up/down button to move it up until the thread gives enough for you to move the fabric.
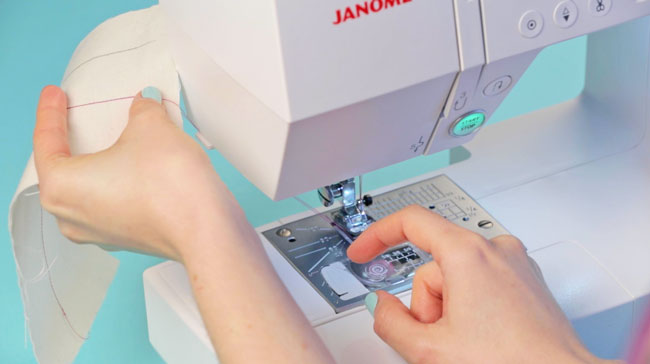
You can snip the threads with small scissors (embroidery or nail scissors are fine). Alternatively – and pretty awesomely – your machine probably has a little blade on the left-hand side that you can use to snip the threads in one uber-slick manoeuvre.
You can sew! Hurrah!
Using a sewing machine for the first time can be a little daunting but just relax, take your time and have some fun with it. Practise stitching on some calico (unbleached cotton) or plain medium-weight cotton - basically you want something that’s cheap and not slippery. Pick out some brightly coloured thread that stands out against the fabric so you can monitor your stitches … and marvel at how your accuracy improves with practice!


Preparing to stitch
Check your sewing machine is threaded up correctly, then turn it on. Make sure it's set to the straight stitch setting with a stitch length of around 2.4mm or 2.5mm - these should be the default settings. On a mechanical machine, you usually need to turn the knobs to change the setting and stitch length; on a digital model you select the stitch type and length with buttons.

Pull out about four inches or so of spare thread under the presser foot and towards the back. This extra thread will help prevent the machine from unthreading itself when you start sewing. It also helps to start with the needle in the uppermost position, and to hold onto the threads when you make your first stitches.
Place your fabric under the presser foot with the area you want to stitch in front of the machine, and lower the presser foot to hold it in place. NB. Lowering your presser foot is essential to help keep the fabric in place (unless you’re doing some freestyle machine embroidery) but is easy to forget – you might want to make your sewing mantra “lower your presser foot” for a while…
The upper/spool thread should be under the presser foot but on top of the fabric, and the lower/bobbin thread underneath the fabric. Both threads should be sticking out towards the back so you don’t sew over them and tie them in knots.
Before you start any new line of stitching, check that the needle is lifted as high as it can go (turn the handwheel to adjust it). This helps to avoid the frustrations of stuck or unravelling thread.

Go!
Turn your machine on. Place both hands lightly on the fabric either side of the presser foot to help guide it as you’re stitching - but don’t push or pull. Needless to say (arf!), keep your fingers out of the way of the needle. Gently lower your foot onto the pedal to start stitching…
Wooooooooooooooooooo!
Fun, isn’t it? Right, I’ll let you enjoy that for a little while…
Okay, back to business. Some machines have speed setting buttons, so you can start slow and build up speed as you throw caution to the wind. If your machine doesn’t have this luxury, you’ll have to learn to control the speed by how much pressure you apply to the pedal. Apparently this is like driving a car, but I wouldn’t know because I don’t drive :)

Using the handwheel or needle up/down button
If you want to stitch reeeeeally sloooowwwly – or maybe just move forward by one or two stitches for added precision – you can use the handwheel at the side of your machine. Turn it towards you to basically perform the same function as the pedal but manually. I sometimes use the handwheel to make the first stitch into the fabric to avoid the thread coming loose and to ensure the needle goes exactly where I want it to go.
Some machines also have a needle up/down button - usually marked with two arrowheads - which will perform the same function, just quicker. Press it once to move the needle down; press it again to move the needle up - and that's one full stitch.


Securing your stitches
To prevent your stitching from unravelling, you can "back tack" (AKA backstitch or reverse stitch) over the start and end of each line of stitching to secure it in place. Hold down the reverse stitch lever or button on your sewing machine - often marked by an arrow turning around - and put your foot down on the pedal while still holding the button down to sew one or two stitches over the start or end of your stitching. Let go of the button and continue sewing.

Cutting loose
Once you’ve finished stitching, raise your presser foot so you can pull your fabric out a little. The needle will need to be raised – you can use the hand wheel or needle up/down button to move it up until the thread gives enough for you to move the fabric.
You can snip the threads with small scissors (embroidery or nail scissors are fine). Alternatively – and pretty awesomely – your machine probably has a little blade on the left-hand side that you can use to snip the threads in one uber-slick manoeuvre.


Comments
Post a Comment