
How to Sew Using Patterns
After learning to sew, it's a natural step to learning to sew with a pattern. Being able to sew using a pattern will provide you with many options for creating garments, costumes, soft furnishings, toys, and other items that can be sewn. This article explains how to sew using patterns.
Part1
Choosing Your Size
-
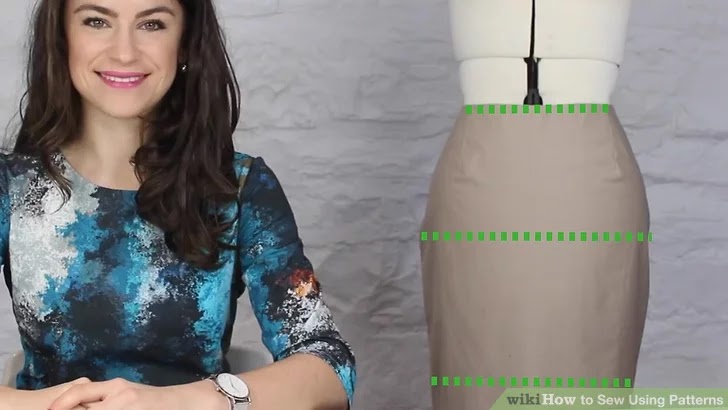
1Select the right size for the person who will wear the garment. If it's for you, have a friend measure you first. Do keep in mind that the units you choose for measurement should not change as it may cause confusion while stitching. Remember, it will not necessarily be the same size as the ready-to-wear clothing you already own, as pattern sizing can vary considerably from what you're used to wearing. Look on the back of the pattern envelope and determine your size by the "finished" measurements it provides.
- Most pattern companies follow an international code for sizes.

-
2Watch out for multi-sized patterns. Some patterns are multi-sized. This means that they will be suitable for a wide range of sizes, although they'll usually still provide an indication of the size range. You'll need to look on the pattern itself for the markings of where to cut for each size.

-
3Leave space for alterations. All patterns contain an allowance for fit, known as "fit or wearing ease", or "designer ease", assuming they are designed for fabrics that require this allowance. The allowance is not included for garments designed for knit fabrics, since these fabrics have natural stretch. Read the instructions on your pattern to find the allowance or look on the pattern itself for "finished" measurements, or something similar.
- Compare the difference between the finished measurements and your body measurements in order to find the allowance.
- If you don't want the allowance that is included, or if you want to make it smaller or larger, you'll need to look out for this.
- This allowance will determine what the final size is for the garment, and indicates whether the garment will fit loosely or closely. Some companies have a standard allowance that corresponds to the descriptions (loose-fitting, fitted, etc.).
- For beginners it is probably better to ignore all of this, as you may not be ready to alter patterns. If you're unsure, leave in the allowance and take the final garment to a tailor.

Part2
Reading the Pattern
-
1Read the directions. Every pattern comes with step-by-step instructions on a separate sheet (user guide), as well as the pattern template sheet (pattern tissue). You should always read the instructions in the user guide before starting the sewing project so that you're aware of what's expected.
- The advice will include how to cut out the template sheet (pattern tissue), how to construct the garment or item, the best way to select sizing, etc.

-
2Check for seam allowances. Check the pattern instructions to find out if the pattern is with or without seam allowances. If it does not include seam allowances, you'll need to cut the fabric with the seam allowances later. It is more normal for seam allowances not to be included.

-
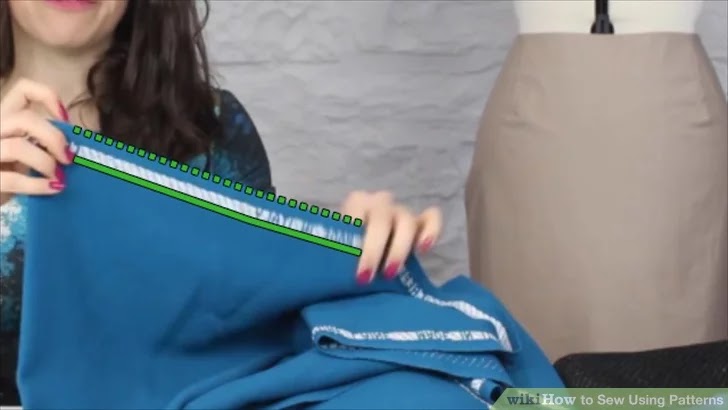
3Notice the grain lines. This is a long straight line with arrow heads at one or both ends. This arrow tells you which direction the paper pattern pieces should sit over the grain of the weave (which direction the grain of the fabric needs to go). For stretch fabrics, they might indicate the direction with most stretch.
- The grain line of the fabric is the same as the direction of the selvage edges (the white edge where the pattern ends). Simply locate the selvage edge to determine the grain line or direction of the fabric.

-
4Look for the notches. These are the triangular marks on the cutting lines. Use them for matching panels precisely, such as an arm in an armhole. You can get single, double, and triple notches. Pros will make tiny cuts into the seam allowance where these notches are but beginners should cut mirrored triangles beyond the cut line, in order to line up the pattern pieces.
- Usually a single notch indicates the front of a garment while a double notch indicates the back. This is not universal, however.

-
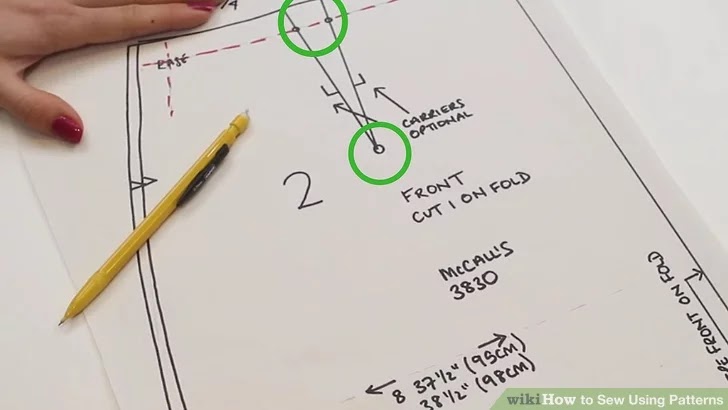
5Find the dots. These little circles can show where darts, zips, pockets, or gathering are to be added, though they usually indicate where you need to place tacks in order to line up two layers of fabric. Refer to your pattern instructions if you are unsure.
- If the pattern does not explain and you see two matching dots on opposite pieces of the pattern, then it is reasonable to assume that these two match up.
- Zipper lines are almost always indicated with a zig-zag line.

-
6Look for button markings. Button placement is usually show with an X, while button holes are marked with a bracket line (like the number lines you drew in your math classes), marking the actual size of the button hole.
-
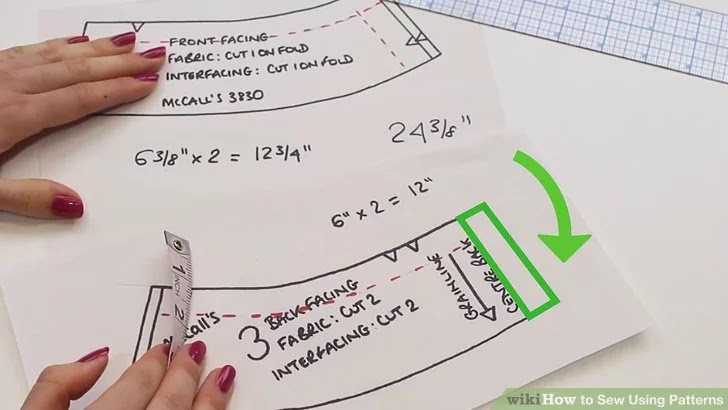
7Look for lengthening and shortening lines. These are parallel lines, usually placed very close together, that show where you can increase or reduce the size of the pattern to improve fit. Always read your pattern instructions to understand how to deal with these, as it usually varies between patterns.
-
8Use the cutting lines. This line is the thick, solid on the outside of a pattern. You should cut along this line. Sometimes it will not be solid and you will see a large number of lines. These indicate that a number of different sizes can be cut, by follow a specific pattern line. Sometimes the size is listed on or near the line, sometimes it is listed in the instructions.

-
9Check for sewing lines. Sometimes this broken or dotted line is included to indicate where the sewing occurs. It's often left out because there is a standard understanding that the sewing occurs 5/8" or 15mm inside the cutting line, so if you don't see it, don't panic.

-
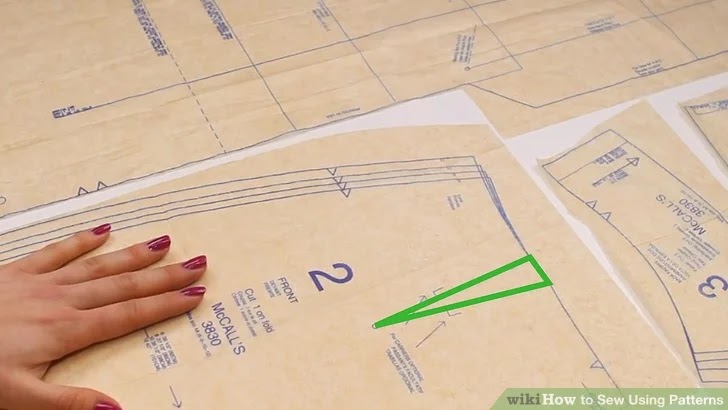
10Sew in darts. If you see a large triangle or diamond shape in your pattern, this is usually to indicate a dart. Darts shape a single piece of fabric to make it fit around a curved form.

-
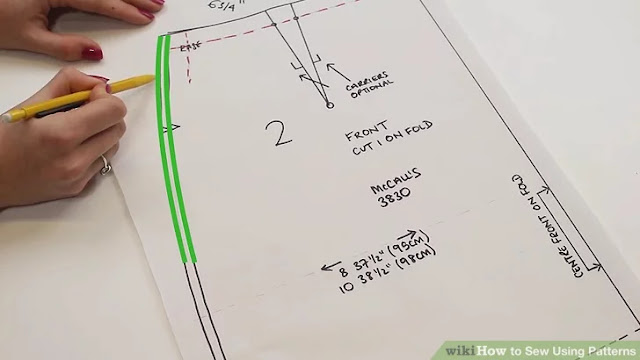
11Watch out for fold lines. These lines, usually clearly labeled on indicated with a special line or bracket, indicate where a piece of fabric should be folded, not cut. Be careful not to cut along this line.


Part3
Using the Pattern

-
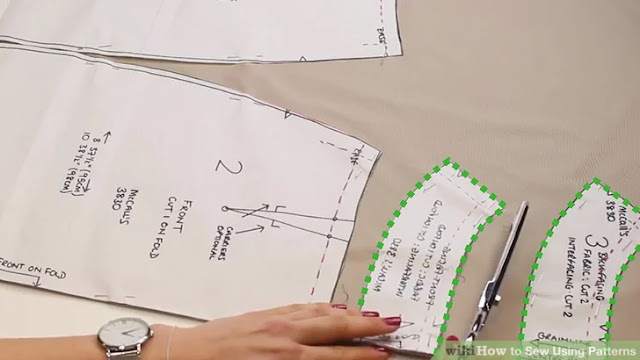
1Cut out the pattern pieces. Find each pattern piece that you will need to use and cut it out. You will cut the fabric using the solid line on the pattern pieces as a guide.
- Use a pair of scissors specifically earmarked for cutting out paper sewing patterns. Keep another pair of 8" (20.3cm) long scissors specifically earmarked for cutting out fabric. Sewing patterns tend to dull scissors and sharp scissors are needed to easily cut fabric.
- If you slip and make a cut where you shouldn't have, simply tape it back into place as best you can. The important thing is that the shape is retained and that you can still read the markings.
- You can transfer the final cut-out pattern onto card-stock or cardboard if you want a stiffer pattern to use.

-
2Lay out the patterns according to the user guide. The user guide will contain a fabric layout guide for each of the items in the pattern pack.
- The layouts can vary according to which fabric widths you've chosen and whether the fabric is "with nap" or not. The term "nap" refers to the up-and-down nature of a print (namely, could the design be cut upside down by accident?).
- Pin the pattern pieces to the fabric following the user guide. Usually you will pin the pieces together using 5/8" (15mm) seam allowance. However, make sure you double-check the seam allowance in the pattern because not all patterns use 5/8" (15mm). You can also use pattern weights so you won't damage fine or delicate fabric with the needles.
- You will now have half of the garment. Have a friend check the fit and help you make any needed alterations in size or length.
-
3Mark and cut the pattern. Mark the pattern using tailor's chalk or a tracing wheel and tracing paper. You can also make tape labels for the back of each pattern piece so you won't get confused when you start to sew and don't know what you are looking at.
- Credits: wikiHow
- Facebook: https://www.facebook.com/mysewingmall/
Instagram: https://www.instagram.com/mysewingmall/
Twitter: https://twitter.com/MySewingMall
Website: https://www.mysewingmall.com

Comments
Post a Comment